
Vehicle Specific Cruise Control for LDV eDelivery 9 2021>
Maintain a steady speed effortlessly
Set custom speed limits for safety
Prevent exceeding preset speed limits
Vehicle Specific for Easy Installation
Pre-programmed for compatibility
No impact on vehicle warranty
Installation what to expect:
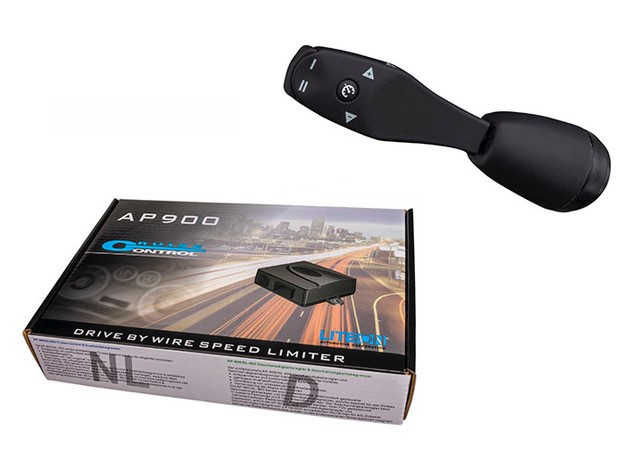
Cruise control is an essential product that improves driver comfort and vehicle safety for passengers. This system not only maintains a steady speed at the touch of a button but also acts as a driver-set speed limiter where drivers can choose a maximum speed according to road conditions, allowing the vehicle to be driven at any speed below the set limit. Additionally, it features a top-end speed limiter that sets a maximum speed limit upon installation and prevents the vehicle from being driven above that speed. Having a cruise control system installed in your vehicle is highly recommended. If you’re wondering how to purchase and install one, it typically takes about 2-4 hours to install depending on the make, model, and year of your vehicle. However, some vehicles may take longer to install depending on their physical and electronic accessibility.
What’s included in the box:
Cruise control safety features:
General installation process – *********
The installation process for a cruise control system usually takes around 2-4 hours, depending on the make, model, and year of the vehicle. Some vehicles may require more time due to physical and electronic accessibility issues.
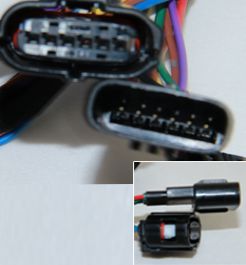
To install the system, you’ll need to remove the knee-trim and steering column cowling to access the area under the dashboard and the steering column. You’ll then need to use soldered joints to connect the +ve and CANBUS connections. Next, you’ll need to install the clutch switch and connect it to the cruise computer. Unplug the throttle pedal connector and place the T-harness inline. Connect the other end of the T-harness to the cruise computer. Once the hardware installation is complete, install the command module to the steering column cowling. Make sure to mark the best position before removing the trim. Run the cabling and connect it into the main computer loom. Finally, the setup procedure is straightforward and doesn’t require any additional equipment. The information needed to communicate with the vehicle is pre-installed by Conrad Anderson, so all that is required is to allow the vehicle to access the information.
The static setup procedure for cruise control installation typically involves two steps: pedal setup and CAN search.
After completing the pedal setup and CAN search, it is recommended to take the vehicle on a short drive to test the cruise control and ensure that it is working correctly.
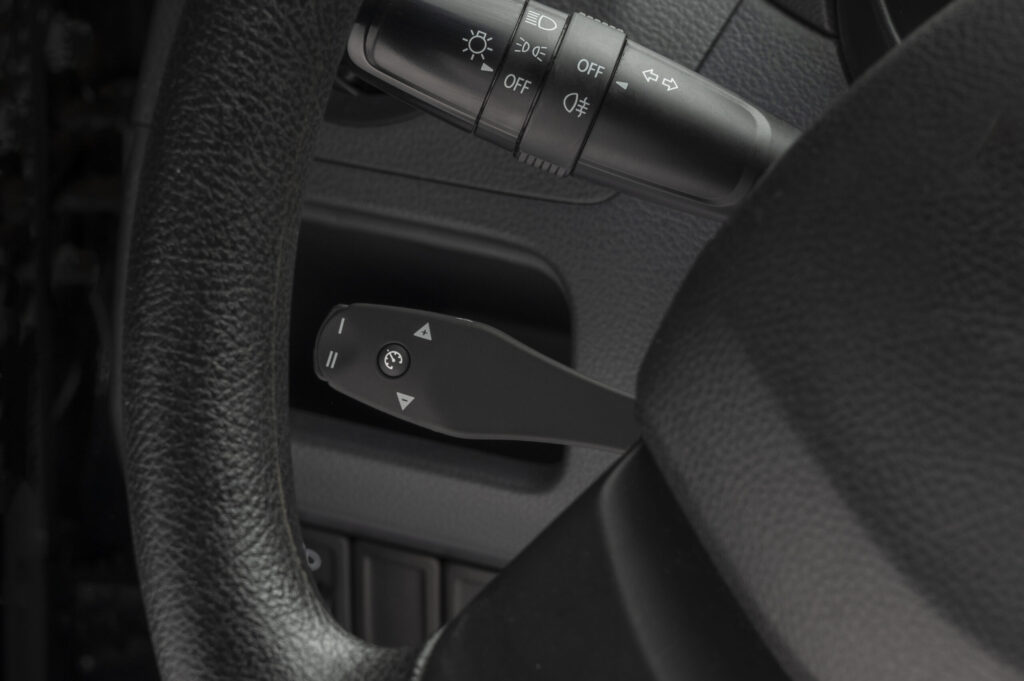
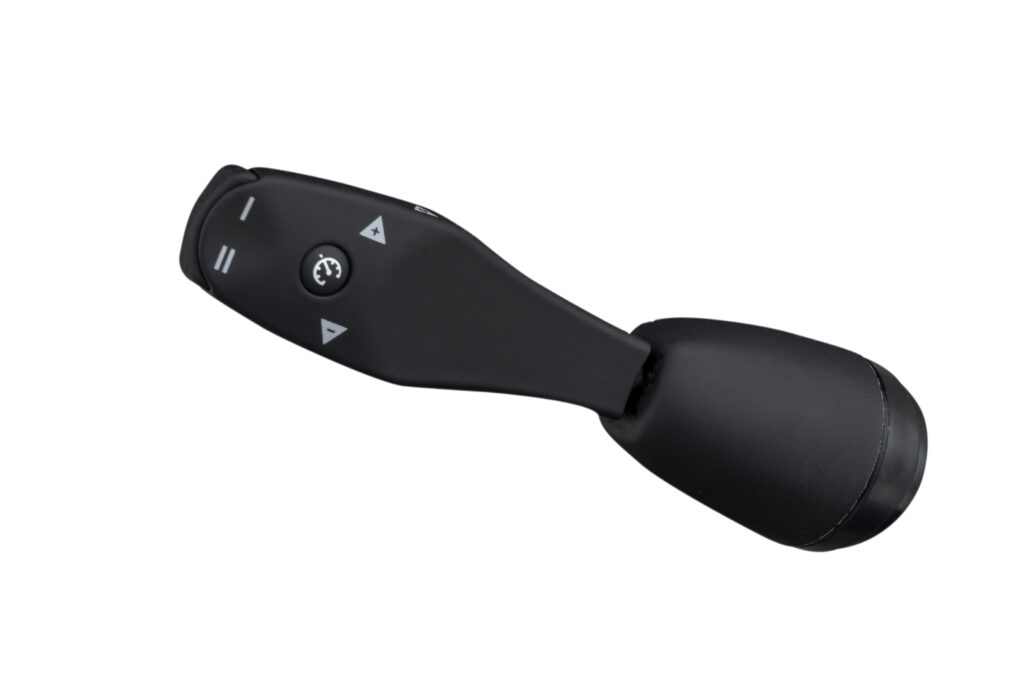
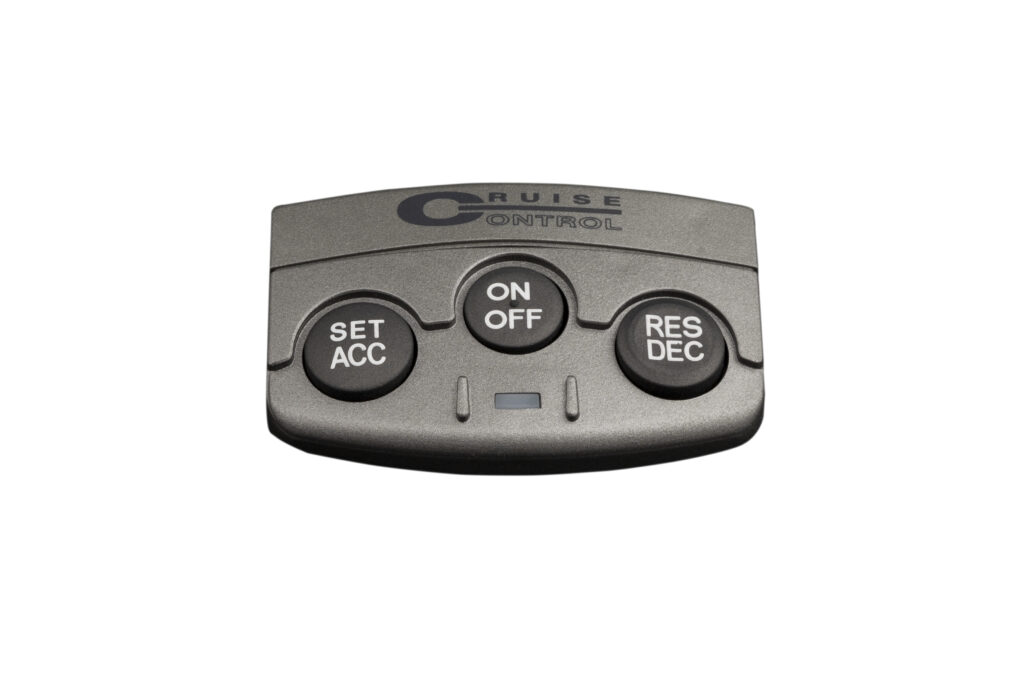
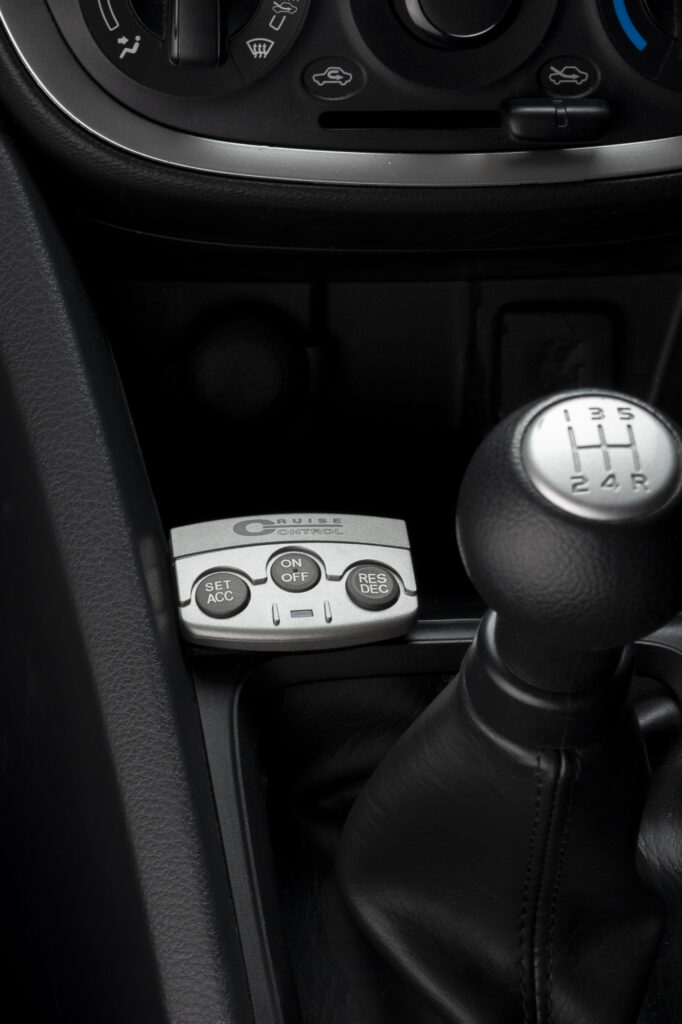
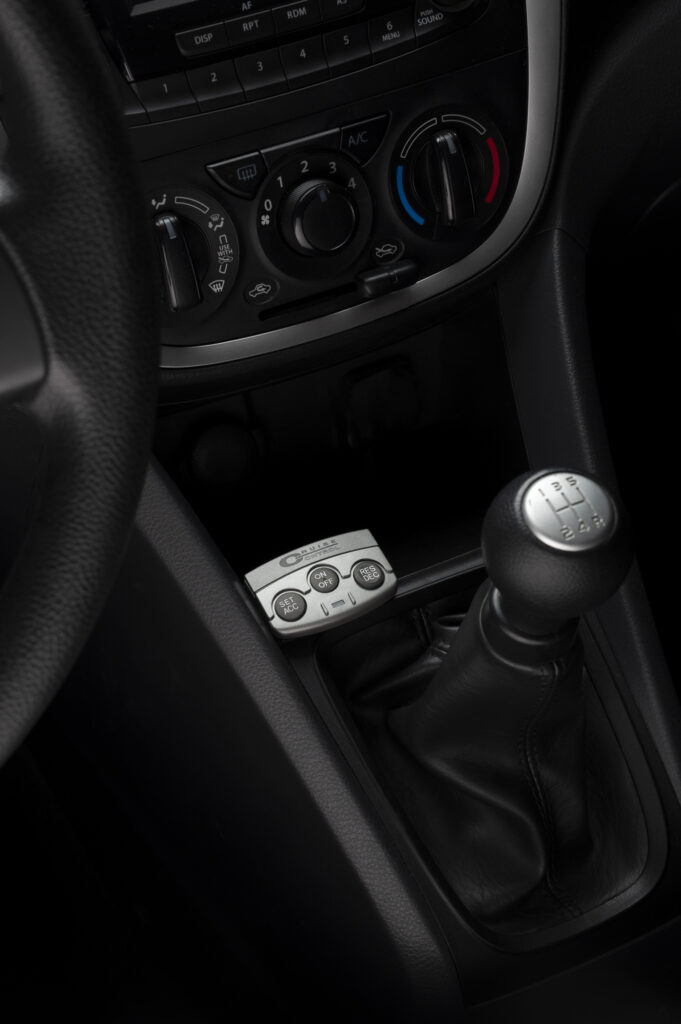
Command module functions:
The GC3 is the basic stalk that is included in the product price, and it comes with all the basic functions, including setting the current speed, increasing and decreasing speed, coasting (which deactivates the cruise and can also be done by pressing the brake or clutch pedal), and resuming the previous speed.
In addition to these functions, the alternative command modules also include preset speed memory buttons. These buttons allow the driver to set and change specific speeds at any time. These speeds are non-volatile, meaning they remain set even after the ignition is turned off.
Command module installation:
Installation of the command module is straightforward. The stalk is bolted to the steering column cowling, with wiring running through the center of the hollow mounting bolt to the main computer wiring loom. The wires are supplied non-terminated to allow them to be run through the drilled cowling. Once the wires are in place, the connector is connected to the pre-pinned cables. It’s important to mount the module in a location that provides enough space to the rear of the cowling for the securing nut and flanged washer. The final position of the stalk can be adjusted using the integral ball joint.
If the cruise control is not working properly, here are some troubleshooting steps to take:
If you’re still having issues, contact the technical support team at 01212470619
| Weight | 0.7 kg |
|---|---|
| Dimensions | 23.5 × 16 × 7 cm |